Sponsored Ads
Nothing grabs my attention faster than spotting a dark stain under my car. An engine oil leak isn’t just a messy inconvenience—it’s a warning sign that something’s wrong under the hood. If left unchecked, even a small leak can lead to more significant problems and costly repairs down the road.
I know how stressful it can be to wonder where that oil is coming from and how serious the situation might be. That’s why I want to break down what causes engine oil leaks and what steps I can take to spot and fix them quickly. With the right approach, I can keep my engine running smoothly and avoid unwanted surprises.


Understanding Engine Oil Leaks
Engine oil leaks create immediate risks to engine performance and long-term vehicle reliability. Spotting an oil leak early relies on recognizing key symptoms and understanding their impact.
What Is an Engine Oil Leak?
An engine oil leak occurs when oil escapes from the lubrication system. I locate leaks along engine gaskets, seals, oil pans, or the valve cover. Leaks manifest as visible drips, stains under the vehicle, or reduced oil levels on the dipstick.
Common Signs of an Engine Oil Leak
Common signs of an engine oil leak include visible oil spots, increased oil consumption, and a burning oil smell.
- Oil spots: I see brown or black puddles under the car after parking.
- Low oil levels: I notice drops in dipstick readings between oil changes.
- Burning smell: I detect a sharp, oily odor, especially after the engine has warmed up.
- Engine smoke: I observe blue or gray smoke from the exhaust if oil drips onto hot surfaces.
Why Engine Oil Leaks Are Serious
Engine oil leaks decrease lubrication and cause severe internal damage. I recognize increased wear, potential overheating, or total engine failure as immediate threats once lubrication falls below safe levels. Small leaks, if left unfixed, escalate into costly repairs, with examples including damaged bearings or seized pistons.
Early detection preserves engine health and safety.
Tools and Materials Needed

The efficient identification and repair of an engine oil leak depend on the right equipment. I organize my workflow by gathering specialized tools, optional resources, and safety equipment before I start.
Essential Tools
- Socket set: I use a metric socket set for removing and tightening engine components on most vehicles.
- Wrenches: I choose open-end and box wrenches for accessing hard-to-reach bolts, such as those on oil pans and valve covers.
- Screwdrivers: I rely on both flathead and Phillips drivers for clamps and minor fittings near engine seals.
- Torque wrench: I ensure proper torque specification when reinstalling bolts, using an accurate click-type or beam-style wrench.
- Oil catch pan: I collect leaking oil directly beneath the engine with a sturdy pan made of metal or plastic.
- Rags and shop towels: I clean excess oil and surface residue using lint-free towels for a clear view of the leak source.
- Flashlight: I illuminate dark engine crevices with a high-lumen LED flashlight to trace fresh leaks.
- Jack and jack stands: I use a hydraulic floor jack and secure it with heavy-duty jack stands before working under the car.
Optional Equipment
- UV dye kit: I add ultraviolet oil dye to the engine and use a UV light to detect elusive leaks at gaskets and seals.
- Inspection mirror: I find small leaks behind engine parts using an extendable mirror with a swivel head.
- Oil filter wrench: I remove tight oil filters faster with a strap or cap-style wrench if a filter is involved in the leak.
- Digital camera or phone: I document leaks before repair by taking clear photos for comparison and evidence.
Safety Precautions
- Nitrile or latex gloves: I protect my skin from hot oil and engine chemicals using disposable gloves with a tight fit.
- Safety glasses: I shield my eyes from splashes and debris by wearing ANSI-rated safety glasses.
- Well-ventilated workspace: I avoid inhaling harmful oil fumes by working in a space with steady airflow, such as a garage with open doors or outdoors.
- Engine cooldown: I let the engine cool for at least 30 minutes after driving to prevent burns from hot oil and metal surfaces.
Identifying the Source of the Oil Leak
Locating the source of an engine oil leak helps control further engine damage. My direct approach pinpoints the origin efficiently by focusing on visible evidence and common trouble spots.
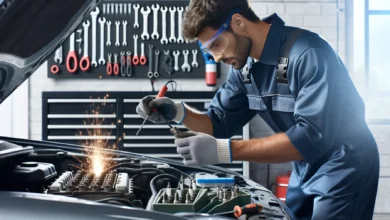
Inspecting Under the Hood
Examining the engine compartment for fresh oil residue provides the fastest clue. I look for dark, wet patches around gaskets, valve covers, and the oil filter area. Using a flashlight to scan around intake manifolds, timing covers, and the top of the oil pan, I detect drips or pooling oil. I pay attention to burnt oil odors or white smoke near the exhaust manifold, which usually signals oil contact with hot surfaces. For hard-to-see areas, I use a mirror or UV dye kit for increased accuracy.
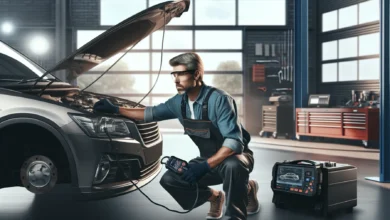
Checking Under the Vehicle
Assessing leaks beneath the vehicle shows where oil escapes once gravity pulls it down. I study the ground or the splash shield directly under the engine for fresh oil spots or stains. I note the color and location of the oil, as dark brown or black indicates engine oil. I inspect the oil pan, drain plug, and filter for coating or seepage and follow any oil trail upward to its highest wet point. If dripping persists only after the engine has run, temperature is a potential factor influencing seal or gasket failure.
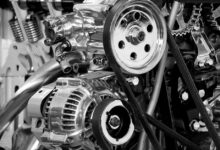
Common Leak Points in Engines
Identifying known weak spots on engines isolates the most likely source of an oil leak. These include:
- Valve Cover Gaskets: Oil pools around the top edge of the cylinder head and cover seam.
- Oil Pan Gasket: Leaks typically appear at the perimeter or corners of the oil pan, usually near the bottom of the engine.
- Front and Rear Main Seals: Oil accumulates between the engine and transmission bell housing.
- Camshaft and Crankshaft Seals: Dampness forms behind pulleys or timing covers.
- Oil Filter or Drain Plug: Oil appears directly beneath either component if it is not secure or if the seal or gasket fails.
Focusing my inspection on these engine oil leak vectors enables me to identify the root cause of the issue rapidly.
How to Fix an Engine Oil Leak
I address specific engine oil leak repairs by targeting the most common root causes of these issues. Each method applies to particular situations depending on the leak’s origin and severity.
Tightening Bolts and Components
I tighten bolts and components securing valve covers, oil pans, and timing covers if I find oil seeping around these areas. I use a calibrated torque wrench and verify the manufacturer’s torque specifications before tightening bolts. I inspect for stripped threads or cracked parts, especially if over-tightening has occurred before. I replace damaged fasteners when I detect compromised threads.
Replacing Gaskets and Seals
I replace gaskets and seals, such as valve cover gaskets, oil pan gaskets, or crankshaft seals, when I confirm visible wear, hardening, or oil leakage. I remove the faulty gasket or seal, clean all mating surfaces with a degreaser, and install a new part using manufacturer-approved materials. I confirm even seating and specified torque, testing for continued leaks by idling the engine for 5 to 10 minutes after installation.
Using Engine Oil Stop Leak Additives
I consider engine oil stop leak additives only for minor engine oil leaks on older engines where gasket replacement is less practical. I select a reputable brand formulated for the specific gasket or seal and add the recommended amount directly to the crankcase, following the product instructions. I monitor for improvement over the next 200 miles, as these additives recondition seals and gaskets rather than repair severe damage.
When to Consult a Professional Mechanic
I consult a professional mechanic if I observe persistent leaks after DIY repairs, suspect internal gasket failure, such as a head gasket, or notice engine oil in the coolant. I also seek expert help if repairing leaks requires lifting the engine or accessing timing cover seals, which involve complex disassembly. I prioritize professional evaluation for leaks involving high-pressure oil systems or when the leak’s location remains undetectable after inspection.
Preventing Future Engine Oil Leaks
Protecting the engine oil system relies on proactive steps. I focus on consistent care to reduce the risk of recurring leaks.
Regular Maintenance Tips
Inspecting engine gaskets and seals for visible wear or residue every 5,000 miles prevents missed early signs. Replacing oil filters and performing oil changes at the intervals recommended by the manufacturer’s guidelines helps maintain proper lubrication. Cleaning the engine bay twice a year helps eliminate grime buildup that can hide minor leaks. Checking torque on bolts around the oil pan and valve covers at each oil change ensures that parts remain tightly secured during heat cycles.
Choosing the Right Engine Oil
Selecting oil with the correct viscosity and specifications that meet my engine’s requirements supports the longevity of the seal and gasket. Using synthetic oils in high-mileage vehicles, such as those over 75,000 miles, offers better leak protection compared to conventional oils, according to API and manufacturer data. Avoiding off-brand products or unverified engine oil additives shields my lubrication system from accelerated degradation.
Monitoring Oil Levels
Checking the dipstick for accurate oil levels every other fuel fill-up alerts me to mild consumption or slow leaks that might otherwise go unnoticed. Recording oil usage patterns gives early detection of internal or external leaks. Topping off only with the same grade and type of oil used in prior service maintains consistent protection and reduces variable stress on engine seals.
Troubleshooting and Common Issues
Engine oil leak troubleshooting relies on recognizing recurring patterns and addressing immediate complications. My approach highlights persistent leaks, issues after oil changes, and responses to related engine warning lights.
Persistent Leaks After Repair
Persistent engine oil leaks often indicate underlying problems or incomplete initial repairs. I check gasket surfaces for improper sealing, verify all bolts have been torqued to specifications, and inspect for hairline cracks in the engine block or oil pan. Reusing old gaskets or failing to clean mating surfaces thoroughly commonly causes repeated leaks. I replace both gasket and seal in high-mileage engines and confirm component alignment before reassembly.
Oil Leaks After an Oil Change
Oil leaks following an oil change frequently result from mistakes during filter or drain plug installation. I verify that the oil filter sits flush against the engine mount and that its gasket is not double-stacked. Drain plugs can permit leaks if incorrectly torqued or if the crush washer is missing or damaged. I always wipe the surrounding areas clean of residual oil to detect fresh leaks more accurately after changing the oil. Leaks sometimes indicate that the wrong oil viscosity was used, so I confirm that the oil meets engine specifications.
Dealing With Engine Warning Lights
Engine warning lights, such as the oil pressure warning, alert me to potential consequences of an oil leak or low oil levels. I check engine oil levels immediately if the oil can symbol or red warning indicator appears. Some vehicles trigger warning lights after leaks drop oil pressure below safe limits. Multiple warning lights, especially after a leak, indicate possible internal damage, so I avoid starting the engine until it has been inspected. Scanning for diagnostic trouble codes (DTCs) provides clarity if warning lights persist with no visible leaks.
I employ systematic troubleshooting at each step, addressing persistent leaks, post-oil change issues, and engine warnings to restore the integrity of the engine lubrication system quickly.
Conclusion
Staying proactive about engine oil leaks has saved me from major headaches and expensive repairs down the road. I’ve learned that even the most minor leak can quickly escalate into a larger issue if left unaddressed. By keeping a close eye on my vehicle’s condition and addressing leaks as soon as they appear, I protect both my engine and my wallet. Regular checks and a bit of preventative care go a long way in keeping my car running smoothly for years to come.
Frequently Asked Questions
What causes engine oil leaks in cars?
Worn gaskets or seals, loose bolts, damaged oil pans, or issues with the valve cover are typically the causes of engine oil leaks. Over time, heat and pressure can cause rubber components to degrade, leading to leaks.
How can I tell if my car has an engine oil leak?
Common signs of an oil leak include visible oil spots or puddles under the vehicle, a burning oil smell, low oil levels, or an increase in oil consumption. You may also notice engine warning lights on your dashboard.
Is it safe to drive with an engine oil leak?
Driving with an engine oil leak is risky and not recommended. Low oil levels can lead to poor engine lubrication, overheating, and severe internal engine damage. It’s best to address the leak promptly to avoid costly repairs.
How do I identify the source of an engine oil leak?
Inspect the engine for fresh oil residue around gaskets, seals, the oil filter, and the oil pan. Use a flashlight for better visibility and check under the car for oil spots. Focus on common problem areas such as valve cover gaskets and oil pan gaskets.
What tools are needed to repair an engine oil leak?
Essential tools include a socket set, wrenches, screwdrivers, a torque wrench, an oil catch pan, rags, a flashlight, and a jack with stands. Optional tools, such as a UV dye kit or inspection mirror, can aid in detection.
Can I use stop leak additives to fix engine oil leaks?
Stop leak additives can help seal minor leaks temporarily, but they are not a permanent solution to the problem. For best results, it’s advised to repair or replace faulty gaskets and seals.
What should I do if tightening bolts doesn’t stop the leak?
If tightening bolts doesn’t resolve the leak, the gasket or seal may be worn or damaged and require replacement. A professional mechanic should inspect and address persistent leaks.
How often should I check my engine for oil leaks?
It’s recommended to inspect your engine for leaks and check oil levels at every oil change or at least every 5,000 miles. Regular checks help catch problems early.
Why does my car leak oil after an oil change?
Oil leaks after an oil change often result from improperly installed oil filters, loose drain plugs, or overfilled oil. Double-check these components to ensure everything is tight and properly seated.
How can I prevent future engine oil leaks?
Please do regular maintenance, including checking and replacing gaskets or seals, using the correct oil type, adhering to oil change intervals, and cleaning the engine bay. Monitoring oil levels helps detect potential leaks early.