Engine Overhaul Guide: Signs, Steps, Tools, and Tips for a Long-Lasting Engine Rebuild
Sponsored Ads
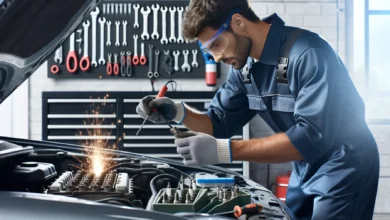
When my car’s engine starts acting up, I know it’s time to think about more than just a quick fix. An engine overhaul may sound intimidating, but it’s often the most effective way to revive a struggling vehicle. Whether I’m dealing with rough idling, loss of power, or strange noises under the hood, I want the peace of mind that comes from a thorough solution.
I’ve learned that understanding what an engine overhaul means can make all the difference. It’s not just about swapping a few parts—it’s about giving my engine a fresh start. If you’re curious about how this process works and whether it’s right for your ride, you’re in the right place.


Understanding Engine Overhaul
An engine overhaul provides benefits by restoring critical engine components to their optimal condition. I address this procedure in detail and outline key reasons for considering it.
What Is an Engine Overhaul?
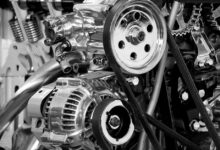
Engine overhaul refers to a comprehensive process of disassembling, inspecting, cleaning, repairing, or replacing worn engine parts, such as pistons, crankshafts, bearings, and gaskets. I remove build-ups from combustion chambers and recalibrate essential settings for reliable operation. I distinguish this approach from a simple engine repair because the process covers nearly all integral engine components, giving the entire assembly a new operational lifespan rather than just replacing isolated, damaged parts.
Signs Your Engine Needs an Overhaul
Many specific symptoms signal the need to consider overhauling an engine:
- Abnormal noises: I detect knocking, tapping, or rumbling that standard repairs cannot resolve.
- Excessive smoke: I observe blue or white exhaust from burning oil or coolant as a frequent indicator.
- Low oil pressure: I see dashboard warnings despite regular oil changes.
- Poor performance: I experience sluggish acceleration, increased fuel consumption, or difficulty starting.
- High mileage: I recommend a proactive approach when a car surpasses 100,000 miles, accompanied by persistent performance drop-offs.
I assess each symptom to ensure an overhaul aligns with the best long-term solution.
Preparing for an Engine Overhaul
Adequate preparation makes an engine overhaul more efficient and reliable. I gather all necessary resources before starting the process.
Required Tools and Materials
I utilize specialized tools and components for engine overhauls to prevent delays and complications.
- Socket sets and wrenches — for bolts and fasteners of various sizes
- Torque wrench — for accurate tightening that matches manufacturer specifications
- Screwdrivers and pliers — for clamps, connectors, and smaller components
- Engine hoist or crane — for safe engine removal and reinstallation
- Engine stand — for stable engine support and rotation during disassembly
- Gasket scraper and cleaning brush — for cleaning residue from mating surfaces
- Replacement gaskets, seals, bearings, rings — for areas with frequent wear
- Oil, coolant, and filters — for refilling fluids post-assembly
Safety Precautions and Best Practices
I prioritize safety to avoid injuries and ensure a precise overhaul.
- Disconnect battery — to eliminate electrical hazards or accidental starts
- Wear safety goggles and gloves for eye and skin protection from debris and fluids
- Use fire extinguishers nearby — for emergencies involving flammable liquids
- Label components and take photos — for clear reassembly guidance and error reduction
- Work in ventilated areas — to avoid inhaling fumes from cleaners or solvents
Setting Up Your Workspace
I prepare the workspace to improve both the speed and quality of an engine overhaul.
- Clean and organize the area for easy access to parts and prevention of foreign material contamination
- Ensure good lighting for visibility during inspections and part installation
- Gather all tools within reach — for a streamlined workflow and minimized interruptions
- Set up bins or trays to sort bolts and small parts for inventory control and loss prevention
These steps anchor my engine overhaul process, reducing the risk of incomplete assembly or avoidable mistakes.
Removing the Engine From the Vehicle
I approach engine removal in methodical steps to avoid damage and streamline the overhaul process.
Disconnecting the Battery and Draining Fluids
I disconnect the negative battery cable first to cut electrical flow and prevent shorts. I locate and open the radiator drain plug, then drain coolant into a container. I follow that by removing the oil drain plug and capturing the engine oil. Transmission fluid removal applies if the vehicle uses an automatic transmission. I dispose of all fluids in compliance with local regulations.
Removing Engine Components
I label and photograph wiring harness connections before detaching electrical connectors for reference during reassembly. I remove the intake manifold, exhaust manifold, and accessory components (e.g., alternator and power steering pump) to reduce weight and improve access. I disconnect hoses, fuel lines, and vacuum hoses at their mounting points, then seal open ends to avoid contamination.
Detaching the Engine From the Vehicle
I securely mount the engine hoist to the manufacturer’s lifting brackets on the engine block. I remove the engine mount bolts gradually while checking that the engine remains supported by the hoist. I ensure the transmission is separated if required by the vehicle model. I gently lift the engine free from the bay, confirming that all connections are clear before fully removing it.
Disassembling the Engine
Measure each step in the disassembly process to safeguard parts and streamline the upcoming inspection. Focus precise attention on labeling, organizing, and systemically removing each component to avoid misplacement and confusion.
Labeling and Organizing Parts
Sort each nut, bolt, bracket, and component into dedicated labeled containers or trays. Assign clear tags to wiring harnesses and hoses using numbered tags or masking tape with a permanent marker. Capture high-quality digital photos of assemblies before separation, such as the intake system and timing components, so that I can reference the exact routing and layout during reassembly. Arrange larger components—such as cylinder heads, manifolds, and timing covers—in a designated clean area that matches their removal sequence.
Removing the Cylinder Head and Valvetrain Components
Release the cylinder head by following the reverse sequence of the manufacturer’s recommended torque pattern to avoid warping, referencing service manuals for engines like the Toyota 2JZ-GTE or Honda K20. Extract camshafts, rocker arms, and lifters individually and keep each part linked to its original position, since mixing locations could lead to accelerated wear on matched surfaces. Could you record the orientation of alignment dowels or special fasteners before storage?
Extracting Pistons, Crankshaft, and Bearings
Rotate the engine block to access the crankcase. Loosen connecting rod bolts uniformly, then tap rods with a soft mallet to push pistons upward through the cylinder bores. Remove the main and rod bearings after noting their installation order and texture. Carefully lift the crankshaft from the block, supporting both ends to prevent scoring of the journals or damage to the thrust surfaces. Segregate each piston, rod, and bearing by cylinder number.
Inspecting Parts for Wear and Damage
Evaluate cylinder bores, pistons, bearings, and valvetrain components for common signs of wear, referencing guidelines from the Automotive Engine Rebuilders Association. Identify scoring, discoloration, cracks, or pitting on surfaces such as piston skirts and crank journals. Measure cylinder bore diameters and piston ring gaps using micrometers and feeler gauges. Note any irregularities, such as excessive play in bushings, burnt valves, or crushed gaskets, as these indicate the need for repair or replacement.
Cleaning and Inspecting Engine Components
Careful cleaning and thorough inspection of engine components increases overhaul quality and engine reliability. Proper preparation ensures accurate measurements and identifies hidden defects.
Cleaning Techniques for Engine Parts
I use several methods to clean engine parts. For aluminum cylinder heads and intake manifolds, I select non-abrasive degreasers to prevent pitting. For carbon-coated pistons and valves, I use stiff-bristled brushes or ultrasonic cleaners to remove deep-seated residue. I submerge crankshafts and connecting rods in solvent tanks for 15-30 minutes to dissolve oil deposits. I rinse every part using low-pressure compressed air to dry surfaces without causing nicks. I avoid wire wheels and sandblasting unless a manufacturer specifies, because harsh abrasion can damage sealing surfaces. Clean gaskets, oil passages, and threaded holes receive special attention to prevent future leaks or blockages.
Measuring Wear and Checking Tolerances
I measure each cleaned engine component with precise tools. I use micrometers and calipers for piston skirts, journals, cylinder bores, and camshaft lobes, recording every measurement. I inspect main bearings and rod bearings for scratches or pitting, checking clearance with Plastigage strips. I compare the valve stem and guide dimensions to the specifications in the OEM manual to detect any excess play. I gauge cylinder bore taper and out-of-round with bore gauges, marking any deviations above the tolerance limit, typically ±0.001 inches for critical areas. I document all measurements on a worksheet to efficiently identify out-of-spec parts.
When to Replace vs. Reuse Parts
I identify engine components for reuse or replacement based on measurement results and visible wear. I plan to reuse pistons and crankshafts only if the measurements fall within the manufacturer’s tolerances and show no cracks or deep scoring. I earmark parts such as bearings, gaskets, oil seals, piston rings, and timing chains for automatic replacement because most of them exhibit fatigue or wear after the engine service intervals. I replace cylinder heads, connecting rods, or camshafts if cracks, excessive pitting, or warping exceed allowable limits set by the service manual. I base each decision on data and manufacturer guidance to ensure my engine overhaul achieves long service life and proper function.
Replacing and Reconditioning Engine Parts
Engine overhaul quality relies on correctly sourcing parts and restoring components. Each task guarantees reliable function and long-term durability when performed precisely.
Sourcing Replacement Parts
A high-quality engine overhaul utilizes verified sources for replacements. I choose OEM suppliers, specialized online retailers, or reputable local parts shops to obtain items like bearings, gaskets, valve components, or timing sets. I verify part numbers, material specifications, and warranty coverage before making a purchase, and I compare prices and reviews to confirm authenticity. Matching replacement parts to the specific engine VIN or code minimizes fitment issues.
Rebuilding or Replacing Pistons and Rings
Overhauled engines achieve consistent compression after I address the pistons and rings. I inspect piston skirts, ring lands, and surfaces for scoring or overheating, and I measure the tolerance against the service manual specifications. I reinstall pistons using new rings after cleaning the grooves and checking the wrist pins for excessive play. Alternatively, I install new forged or cast pistons if warping or cracks are detected. I lubricate ring gaps and stagger orientation during installation to maximize sealing efficiency.
Reconditioning the Cylinder Head and Valves
The function of the cylinder head and valves depends on precise resurfacing and seat reconditioning. I disassemble valve springs, retainers, and seals, then thoroughly clean all ports and chambers. I inspect the cylinder head for cracks and check flatness with a straightedge. Valve stems and faces receive cleaning and measurement checks, and I lap or replace valves as required, restoring tight tolerances. After installing new seals and testing spring tension, I reassemble and perform a leak test to verify sealing integrity.
Machining the Engine Block (If Needed)
Efficient engine block restoration utilizes professional machining services when wear or distortion exceeds acceptable limits. I arrange for cylinder boring, honing, or line boring at a machine shop, referencing original factory specs. Machinists may deck the block to restore surface flatness, resize main bearing saddles, or install new cam bearings. Accurate measurements post-machining ensure correct clearances for piston and crankshaft installation. I always clean oil galleries and coolant passages after machine work to remove residual debris.
Reassembling the Engine
I proceed with engine reassembly by following the correct sequence and clean working conditions to ensure reliable operation. Each stage connects previous inspection and preparation steps to the fitting of components for optimal performance.
Installing New Bearings and Seals
I install main bearings, rod bearings, and crankshaft seals after confirming all journals and housings are completely clean and within tolerance. For example, main bearings and rod bearings require a thin oil film and must align with oil passage holes. I installed crankshaft seals with the manufacturer’s recommended orientation and depth to prevent leaks during operation. Any dust or debris present reduces the effectiveness of the bearing and seal.
Assembling Pistons, Crankshaft, and Connecting Rods
I carefully fitted the crankshaft into new bearings, avoiding scratches or nicks. Pistons and connecting rods slide into cylinders with piston ring compressors and are marked for orientation according to prior disassembly notes. I torque rod caps to the exact values listed for my engine variant. Incorrect piston or rod alignment can increase wear and reduce compression.
Timing Components and Gaskets Installation
I align the timing marks on the crankshaft and camshaft sprockets, as specified in my factory service manual, before fitting the timing belt or chain. I set a new tensioner and confirmed the correct belt or chain slack. Gaskets for the cylinder head, oil pan, and other mating surfaces must match in polarity and surface finish, as any damaged or reused gasket compromises sealing integrity.
Torque Specs and Assembly Tips
I use a calibrated torque wrench to tighten every fastener according to the torque specs and tightening sequence in my engine’s documentation. For example, cylinder head bolts follow a staged sequence: I tighten them to 25 Nm, then to 50 Nm, and finally to 90 degrees from the midpoint. I lubricate fasteners where recommended and double-check completed steps against my assembly notes and photos. Missed torque steps or improper sequence frequently result in leaks or warping.
| Component | Typical Torque Spec (Nm) | Assembly Tip |
|---|---|---|
| Main Bearing Cap Bolts | 65–95 | Follow the sequence from the center outward |
| Connecting Rod Bolts | 40–50 | Check the stretch if specified |
| Cylinder Head Bolts | 25, 50, +90° | Use phased tightening with an angle gauge |
| Oil Pan Bolts | 10–15 | Avoid overtightening to prevent distortion |
| Camshaft Sprocket Bolts | 40–60 | Align marks precisely before tightening |
Each reassembly step increases engine reliability if conditions, measurements, and documented specs match factory requirements.
Reinstalling the Engine
After completing the reassembly, I focus on precision and safety when placing the overhauled engine back into the vehicle.
Reattaching the Engine to the Vehicle
I position the engine hoist over the engine bay to ensure alignment with the motor mounts. I lower the engine steadily, monitoring the angle and mount alignment to prevent binding. I insert all mount bolts finger-tight at first to correct any slight misalignments, then fully tighten each bolt to the manufacturer’s torque specification. I confirm that the engine sits level, using a straightedge across the mounts if necessary for measurement.
Reconnecting All Components and Hoses
I reconnect wiring harnesses, fuel lines, and vacuum hoses by consulting my labeled photos and tags to prevent misplacement. I have attached the intake and exhaust manifolds, confirming that the fresh gaskets are in place and that the bolts match the factory torque specifications. I secure accessory components such as the alternator, power steering pump, and air conditioning compressor, using factory service manual diagrams to check routing and connection order. I ensure all hoses—coolant, heater, and emissions—seat tightly and clamp securely, testing each joint by hand.
Refilling Fluids and Double-Checking Connections
I add engine oil, coolant, and, if applicable, transmission fluid to factory-specified levels, using a calibrated measuring jug for accuracy. I cycle the ignition, watching for leaks or unusual noises, before proceeding with full startup. I visually inspect every wiring and hose connection a final time, confirming positive engagement and proper routing. I torque critical fasteners—such as manifold bolts, mount bolts, and bracket hardware—to specification, referencing charts and factory manuals for exact values.
Initial Startup and Break-In Procedure
Engine startup accuracy and proper break-in ensure reliability after an overhaul. I rely on systematic checks and specific techniques to minimize risk during this critical stage.
Priming the Oil System
Priming the oil system before the first startup maintains critical lubrication for new components. I use an external priming tool or temporarily spin the oil pump with a drill to circulate oil throughout the engine’s galleries. I monitor oil flow at the rocker arms or pushrods where possible, pausing only when oil emerges at all test points. I fill the oil filter and crankcase with oil that meets the manufacturer’s viscosity specifications before proceeding with this process. Immediate oil pressure verification confirms system integrity before energizing the ignition.
First Engine Start Checklist
The first engine start requires a precise checklist to confirm operational readiness:
- Fill the coolant using fresh antifreeze that matches the engine specifications to avoid air pockets.
- Verify all electrical connections—ignition, sensors, and grounds—are secure by referencing labeled photos.
- Confirm fuel lines and intake ducts have leak-free installation to maintain correct air-fuel ratios.
- Inspect all belt-driven accessories and pulleys for clearance or alignment to prevent premature wear.
- Remove the spark or injector fuses and crank the engine for a few seconds to build oil pressure without combustion.
- Reinstall fuses and prepare a fire extinguisher nearby as a safety precaution.
Engine Break-In Tips
I use specific break-in protocols to maximize sealing and component longevity:
- Operate the engine at varied RPM ranges (1,500–2,500) for 20–30 minutes after startup while monitoring for leaks, noise, and stable oil pressure.
- Change engine speed and load frequently for the first 300–500 miles, avoiding steady RPM or excessive idling.
- Limit throttle application to 75% or less during initial operation, if possible, to prevent cylinder glazing.
- Perform the first oil and filter change at 50–100 miles to remove residual debris created during the break-in period.
- Check coolant and oil levels regularly and maintain inspection intervals every 100 miles, especially during the first 1,000 miles.
I document all measurements, pressure readings, and operational anomalies in a maintenance log to track engine health and ensure the effectiveness of overhauls.
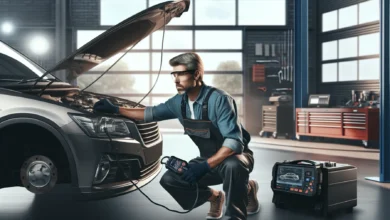
Troubleshooting Common Issues
Troubleshooting issues with a freshly overhauled engine requires detailed observation and methodical checks. I focus on three primary concerns after reassembly: leaks and noises, performance anomalies, and overheating.
Leaks and Noises After Overhaul
Diagnosing leaks and abnormal noises immediately after an engine overhaul involves clear inspection procedures. I examine gasket mating surfaces and fastener torque on the oil pan, cylinder head, and intake manifold if fresh oil or coolant appears under the engine. I listen closely for knocks, rattles, or tapping sounds during initial idle, especially around timing covers and valve trains. Most leaks or noises are related to improper gasket alignment, missed torque sequences, or loose seals. I address persistent leaks by rechecking gasket replacement and using a torque wrench to ensure compliance with factory specifications. I measure exhaust noise pitch, suspecting loose manifold bolts or misaligned exhaust connections when I notice sharp ticking or popping.
Poor Performance or Rough Running
Identifying poor performance or rough running in a rebuilt engine requires systematic elimination of installation or adjustment errors. I connect a scan tool and review error codes before physically checking spark plug condition, injector connectors, and ignition coils. I test engine vacuum and fuel pressure, comparing results to OEM charts for my vehicle. Engine stalling or hesitating under load often indicates out-of-sequence ignition timing, misrouted vacuum lines, or insufficient cylinder sealing due to incorrect piston ring installation. I verify the throttle cable routing and recalibrate the position sensors if the idle remains rough after the checks.
Overheating Problems
Addressing engine overheating after a fresh overhaul involves inspecting the entire cooling system circuit. I monitor the engine temperature rise using OBD-II data or an infrared thermometer, focusing on the radiator cap function and thermostat operation. Most post-overhaul overheating stems from trapped air in the coolant passages, incorrect hose routing, or blocked radiators. I check the coolant level and flow, then bleed the system if temperature spikes occur after the vehicle warms up. I inspect the water pump drive pulley torque and tension to confirm proper coolant circulation. Consistent overheating and steam usually indicate a faulty head gasket sealing or warped surfaces from improper torque application.
| Issue Category | Common Cause Examples | Diagnostic Actions |
|---|---|---|
| Leaks and Noises | Gasket misalignment, loose bolts | Inspect mating surfaces, re-torque fasteners, and check seal engagement |
| Poor Performance | Timing errors, vacuum/fuel issues | Scan for codes, inspect the ignition, test fuel and vacuum, and check the ring and plug installation. |
| Overheating Problems | Air trapped, weak flow, gasket leak | Bleed coolant, inspect hoses and pump, test the radiator cap, and verify torque sequences. |
Targeting these common engine overhaul issues optimizes engine reliability and ensures smooth operation.
Maintenance Tips After Overhaul
Consistent engine maintenance after an overhaul maximizes performance and durability. I focus on high-impact practices that maintain engine reliability and operational smoothness.
Regular Fluid Checks and Changes
Engine longevity relies on diligent fluid checks and timely changes. I inspect the engine oil, coolant, brake fluid, and transmission fluid every 1,000–3,000 miles, referring to my vehicle’s service intervals. For example, I look for oil color and consistency, checking for unusual darkening or metal flakes that may signal internal wear. I replace engine oil and filter after the first 500–1,000 miles post-overhaul, then follow the manufacturer’s recommended interval. I monitor coolant by ensuring the reservoir is at the correct level and the fluid remains clear, without debris or discoloration. I examine brake and transmission fluids during routine maintenance, watching for a cloudy appearance or burnt odor as indications for drainage and replacement. I record fluid levels and change dates in a log to track maintenance cycles and identify emerging issues.
Monitoring Engine Performance
Engine performance monitoring identifies early signs of problems after an overhaul. I listen for abnormal noises such as knocking or ticking, which may suggest loose fasteners or component misalignment. I check for smooth idle, rapid throttle response, and consistent acceleration by taking periodic drive tests. I connect a diagnostic scan tool every few weeks to detect check engine codes and monitor vital parameters, such as oil pressure, coolant temperature, and fuel trims. I investigate visible exhaust smoke, noting color as an indicator of fuel, oil, or coolant issues, such as blue for oil consumption or white for coolant leaks. I review recorded data or logs for any performance anomalies, then address concerns before they escalate.
Conclusion
Taking on an engine overhaul might feel overwhelming at first, but it’s a rewarding investment in your vehicle’s future. With careful preparation and attention to detail, I’ve found that each step becomes more manageable, and the results speak for themselves.
A methodical approach and ongoing maintenance make all the difference in keeping your engine running strong for years. If you’re considering an overhaul, don’t be afraid to take the first step—your car will thank you for it.
Frequently Asked Questions
What is an engine overhaul?
An engine overhaul is a detailed process of disassembling, inspecting, cleaning, repairing, or replacing major engine components. It goes beyond basic repairs, rejuvenating the entire engine to restore power, reliability, and extend its lifespan.
When should I consider an engine overhaul?
Consider an engine overhaul if your car exhibits signs such as rough idling, loss of power, excessive smoke, unusual noises, low oil pressure, poor performance, or high mileage. These symptoms often indicate deep-seated internal issues that require comprehensive repair.
How is an engine overhaul different from routine engine repairs?
Routine repairs typically address individual issues, while an overhaul involves restoring or replacing most internal engine components. An overhaul provides a comprehensive refresh, addressing the root causes of engine problems rather than just their symptoms.
What tools and safety steps are necessary for an engine overhaul?
Essential tools include socket sets, torque wrenches, engine hoists, and cleaning supplies. Key safety steps include disconnecting the battery, wearing protective gear, organizing your workspace, and ensuring good lighting and airflow.
What are the main steps in removing an engine for overhaul?
First, could you disconnect the battery and drain all fluids? Next, label and photograph wiring connections, detach intake and exhaust manifolds, remove accessory parts, and use an engine hoist to safely lift the engine out after disconnecting all mounts.
How should parts be organized during disassembly?
Label, photograph, and store each part in dedicated containers. Organize larger parts by their removal sequence and keep everything in a clean area. This helps ensure an efficient reassembly process and reduces the risk of errors.
What do you think I should check when inspecting engine components?
Look for wear, cracks, scoring, and proper clearances on pistons, crankshaft, bearings, and cylinder walls. Use precise measurement tools to compare against manufacturer specifications and determine whether components can be reused or need replacement.
Where should I source replacement parts for an engine overhaul?
Use OEM (original equipment manufacturer) suppliers or reputable retailers. Always match parts using your engine’s Vehicle Identification Number (VIN) to ensure proper fitment and quality, which is crucial for engine reliability and optimal performance.
Why is professional machining sometimes needed during an overhaul?
If components like the engine block or cylinder head are worn beyond allowable limits, professional machining, such as cylinder boring or honing, restores these surfaces, ensuring proper fit and sealing for new parts.
What are the key reassembly tips after an engine overhaul?
Follow the correct assembly order, use new gaskets and seals, torque all components to the manufacturer’s specifications, and maintain a clean workspace. Double-check all connections and refer to your labeled photos when reattaching wires and hoses to ensure accuracy.
What’s important when reinstalling the engine?
Could you align the engine carefully with the motor mounts using a hoist? Finger-tighten bolts first to adjust the alignment, then torque them to specification. Reconnect all components and hoses, refill all fluids to their factory levels, and inspect everything before starting the engine.
How do you think I should do the initial startup and break-in procedure?
Please ensure the oil system is ready before starting to ensure proper lubrication. Follow the manufacturer’s break-in guidelines, which include varying the RPM and performing regular oil changes. Document any issues and monitor engine health closely during the break-in period.
What should I do if I encounter problems after an overhaul?
For leaks or noises, inspect the gaskets and recheck the torque specifications. For poor performance, scan for error codes and check ignition, fuel, and vacuum systems. For overheating, check coolant flow, thermostat function, and bleed the cooling system.
How can I maintain my overhauled engine for long-term reliability?
Regularly check and change the engine oil, coolant, brake fluid, and transmission fluid. Inspect fluid levels every 1,000–3,000 miles: schedule drive tests and periodic diagnostic scans to catch issues early and keep your engine running smoothly.